Standard booking allows you to purchase an experience and choose a specific date and time, setting an appointment.
Flexi booking allows you to purchase an experience first and then redeem it at a later date by giving the experience provider your unique voucher code.
Please note that for experiences with standard booking, upon the confirmation of your date & time, you will no longer have the option to cancel it.
When you’re in the “Checkout” page, you will see the following field:
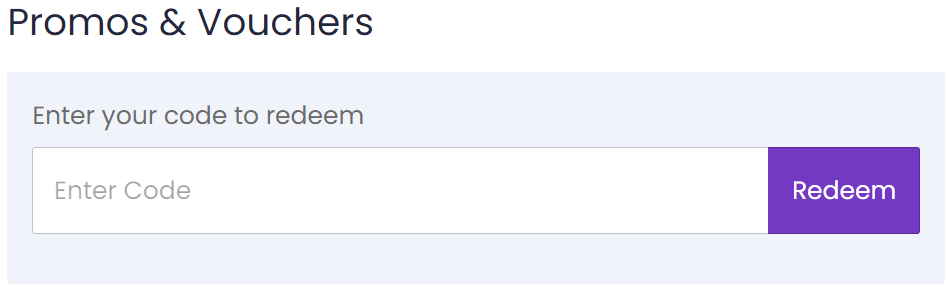
Simply enter your promo code and click “Redeem” to apply your discounts and watch the prices drop!
If someone has gifted you an experience or gift card, you will receive an email that provides you with a unique redemption code.
In order to redeem your gift, take the following steps:
If you already have a YOLO account, your gifted experiences will appear in your Experiences page, which can be accessed by clicking ![]()
If you were given a gift card instead, simply click the “Use a Voucher” button ![]() on the home page and fill the unique redemption code you received via email.
on the home page and fill the unique redemption code you received via email.
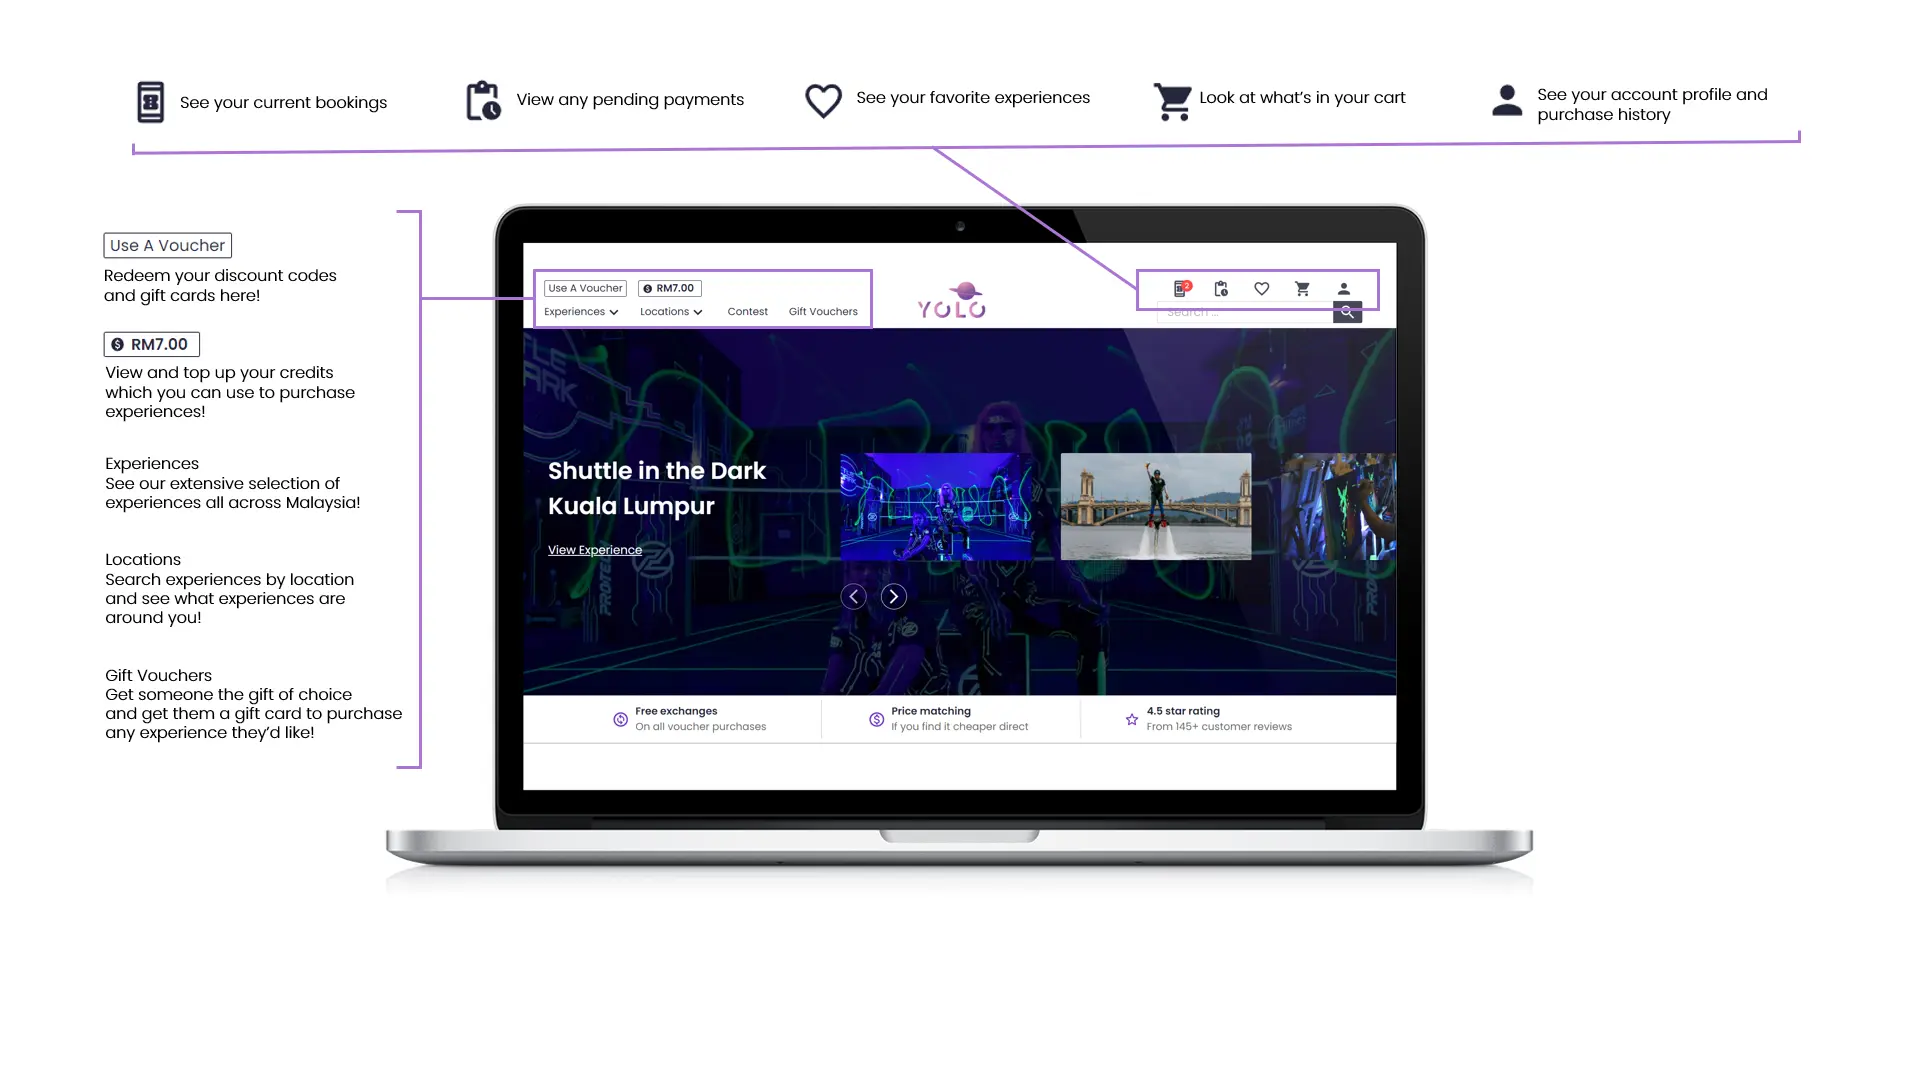
On PC
When on the home page, take the following steps:
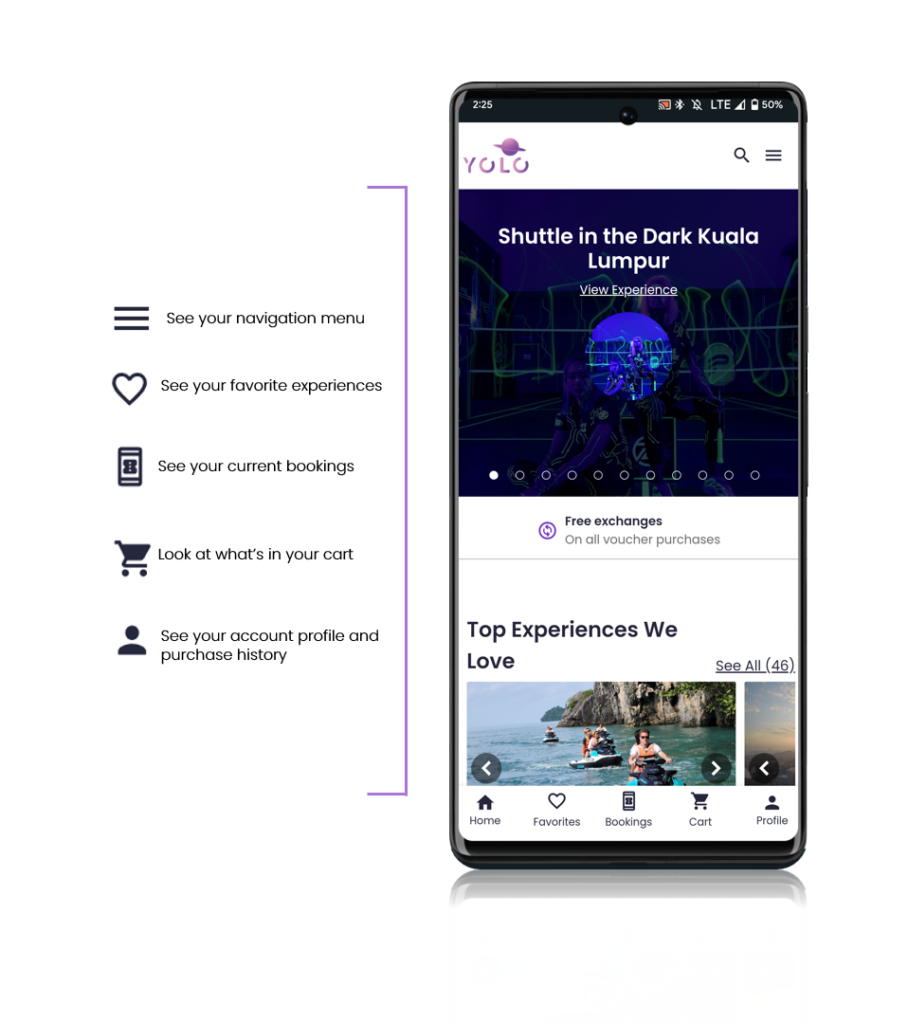
On Mobile
When on the home page, take the following steps:
On PC
When on the home page, take the following steps:

On Mobile
When on the home page, take the following steps:
On PC
When on the home page, take the following steps:
On Mobile
When on the home page, take the following steps:
On PC
When on the home page, take the following steps:
On Mobile
When on the home page, take the following steps:
On PC
When on the home page, take the following steps:
On Mobile
When on the home page, take the following steps:
On PC
When on the home page, take the following steps:
On Mobile
When on the home page, take the following steps:
On PC
When on the home page, take the following steps:
On Mobile
When on the home page, take the following steps: